Rust is one of the most persistent enemies of any vehicle, especially in the undercarriage area where moisture, dirt, and road debris constantly accumulate. If left untreated, corrosion can spread quickly, weakening structural components and leading to costly repairs. Before applying any protective coating, proper rust treatment is not just recommended—it is essential.
This Rust Treatment Guide is designed for car owners and automotive enthusiasts who are dealing with untreated rust conditions. Many people rush into undercoating without addressing the root problem, which often results in trapped corrosion that continues to spread beneath the surface. By understanding the correct preparation process, you can ensure that your undercoating works effectively and lasts for years.
In this article, we will walk through the complete preparation steps, from inspection to rust removal and final surface readiness. Whether you are working on a daily driver or a restoration project, following a structured Rust Treatment Guide will significantly improve your results.
Understanding Rust Formation and Why Treatment Comes First
Rust forms when metal reacts with oxygen and moisture, creating iron oxide. In vehicle undercarriages, this process is accelerated due to exposure to water, mud, salt, and fluctuating temperatures. Over time, even minor surface rust can evolve into deeper structural damage.
Applying undercoating over untreated rust may seem like a quick solution, but it often makes the problem worse. The coating can trap moisture and oxygen underneath, allowing corrosion to continue unseen. This is why a proper Rust Car Treatment Guide emphasizes preparation before protection.
Types of Rust Found on Car Undercarriages
Understanding the type of rust you are dealing with helps determine the right treatment approach.
- Surface Rust
This is the earliest stage and usually appears as light discoloration. It is relatively easy to remove and does not significantly weaken the metal. - Scale Rust
At this stage, rust has started to penetrate deeper, causing flaking and rough surfaces. It requires more aggressive removal techniques. - Penetrating Rust
This is the most severe form, where rust has eaten through the metal. In such cases, panel replacement or welding is often necessary.
Each level requires a different approach, and skipping proper assessment can lead to ineffective repairs.
Why Skipping Rust Treatment Is Risky
Ignoring rust treatment before undercoating can lead to several issues:
- Continued corrosion beneath the coating
- Reduced adhesion of protective layers
- Structural weakening over time
- Increased long-term repair costs
A well-executed Rust Treatment Guide ensures that the surface is stable and ready to receive protective coatings, maximizing durability and performance.
Step-by-Step Preparation Before Undercoating
Before applying any anti-rust coating, the undercarriage must go through a detailed preparation process. This stage is the foundation of long-lasting protection.
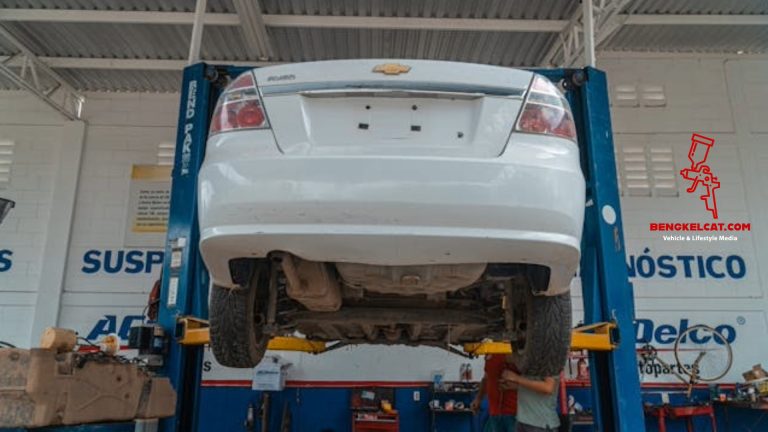
Initial Inspection and Assessment
Start by thoroughly inspecting the undercarriage. Use proper lighting and, if possible, lift the vehicle for better access. Look for visible rust spots, bubbling paint, or flaking metal.
Pay attention to critical areas such as:
- Frame rails
- Suspension mounting points
- Floor pans
- Wheel wells
This inspection phase is crucial in any Rust Treatment Guide, as it determines the extent of work required.
Cleaning the Undercarriage
Before removing rust, all dirt, grease, and debris must be eliminated. A pressure washer is highly recommended for this step.
Allow the surface to dry completely after washing. Moisture left behind can interfere with rust removal and later stages of treatment.
Mechanical Rust Removal
Once the surface is clean, the next step is removing rust mechanically. This can be done using:
- Wire brushes
- Sandpaper
- Angle grinders with wire wheels
For moderate to heavy rust, power tools significantly speed up the process. The goal is to remove loose rust and expose solid metal underneath.
This stage is a core part of any effective Rust Treatment Guide because it ensures that no unstable material remains on the surface.
Chemical Rust Treatment
After mechanical removal, applying a rust converter or rust remover helps neutralize remaining corrosion. These products chemically transform rust into a stable compound that prevents further oxidation.
Allow sufficient curing time based on the product instructions. Skipping this step can reduce the effectiveness of the entire treatment process.
Repairing Damaged Areas Before Coating
In some cases, rust damage goes beyond surface-level issues. Addressing these problems before undercoating is essential for safety and durability.
When to Repair or Replace Panels
If rust has caused holes or severe thinning, replacing the affected panel is often the best option. Temporary fixes may not hold up over time, especially in load-bearing areas.
Common repair methods include:
- Welding new metal sections
- Using patch panels
- Reinforcing weakened structures
These repairs should be completed before moving forward in the Rust Treatment Guide process.
Surface Smoothing and Preparation
After repairs, the surface should be smoothed using sanding or grinding tools. This ensures better adhesion for primers and coatings.
Any sharp edges, uneven welds, or leftover debris should be addressed at this stage.
Applying Primer Before Undercoating
A high-quality primer acts as a bonding layer between the metal and the undercoating. It also provides an additional layer of corrosion resistance.
Choose a primer specifically designed for automotive use and compatible with your chosen undercoating material.
Following this structured Rust Treatment Guide ensures that the surface is fully prepared for long-term protection.
Experience-Based Insight from Real Handling Process
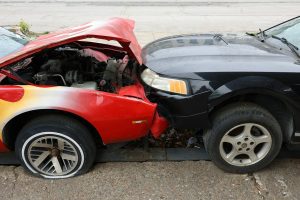
From direct field experience, proper rust treatment always follows a disciplined workflow. The process typically begins with a detailed inspection to identify both visible and hidden corrosion. Rust spots are then removed, often revealing that the damage has spread beyond the initial area. In more severe cases, affected panels must be replaced, followed by precise welding to restore structural integrity.
The final stage involves surface finishing to ensure a smooth and stable base. This sequence—inspection, rust removal, panel replacement if necessary, welding, and finishing—is critical in achieving a durable result and reflects the practical application of a professional Rust Treatment Guide.
Preparing for Undercoating Application
Once rust treatment and repairs are complete, the undercarriage is almost ready for coating. However, a few final steps are necessary to ensure optimal results.
Final Cleaning and Degreasing
Even after all previous steps, residues from sanding, chemicals, or handling may remain. Use a degreaser to clean the surface thoroughly.
A clean surface improves adhesion and ensures the coating bonds properly.
Masking Sensitive Components
Before applying undercoating, protect components that should not be coated, such as:
- Exhaust systems
- Brake components
- Rubber bushings
Masking these areas prevents unwanted damage and maintains proper vehicle function.
Choosing the Right Undercoating Material
There are several types of undercoating products available, including:
- Rubberized coatings
- Asphalt-based coatings
- Wax or oil-based treatments
Each type has its advantages, depending on usage conditions and climate. Selecting the right product is the final step in completing your Rust Treatment Guide preparation.
Common Mistakes to Avoid
Even with the right knowledge, mistakes can happen during rust treatment. Avoiding these common errors can save time and money.
- Skipping thorough cleaning before rust removal
- Applying coating over active rust
- Ignoring small rust spots that later spread
- Using incompatible products
- Rushing drying or curing times
A complete Rust Treatment Guide always emphasizes patience and attention to detail.
Estimated Time and Cost Considerations
Rust treatment and preparation can vary depending on the vehicle condition.
For light rust:
- Time: 4–8 hours
- Cost: $50–$150 for materials
For moderate rust:
- Time: 1–2 days
- Cost: $150–$400
For severe rust with repairs:
- Time: 2–5 days
- Cost: $500–$1500 or more
These estimates depend on tools, materials, and whether the work is done independently or professionally.
Conclusion
Treating rust before undercoating is not just an optional step—it is the foundation of effective corrosion protection. Skipping proper preparation can lead to hidden damage, reduced coating performance, and higher repair costs in the future.
By following a structured Rust Treatment Guide, you ensure that every stage—from inspection to final preparation—is handled correctly. This process not only improves the durability of your undercoating but also extends the overall lifespan of your vehicle.
Taking the time to address rust properly today will save you from much bigger problems tomorrow. Whether you are maintaining your daily car or restoring an older vehicle, a thorough Rust Treatment Guide remains the key to long-lasting protection and peace of mind.