
Protecting the underside of a vehicle is one of the most overlooked yet critical maintenance steps. Once rust has been properly removed and treated, the next logical step is to apply a durable protective layer. Learning how to Undercoat a Rusted Car Undercarriage ensures your vehicle stays protected from moisture, road debris, and corrosion for years to come.
A properly undercoated car not only lasts longer but also maintains structural integrity and resale value. This guide walks you through the correct process after rust cleaning, using professional methods and practical insights.
Why Undercoating Matters After Rust Treatment
After rust removal, the metal surface becomes vulnerable. Even if it looks clean, microscopic corrosion can reappear quickly if left unprotected. This is where undercoating plays a vital role.
Undercoating acts as a barrier between the metal surface and external elements such as water, salt, and dirt. Without it, the effort spent on rust treatment can go to waste in just a few months, especially in humid or coastal environments.
When you Undercoat a Rusted Car Undercarriage, you essentially seal the surface and prevent oxygen and moisture from triggering oxidation again. This is particularly important for older vehicles or cars frequently exposed to wet road conditions.
Types of Undercoating Materials
Different materials offer varying levels of protection. Choosing the right one depends on your budget and usage.
- Rubberized undercoating
This is the most common type. It provides flexibility and sound insulation while resisting chipping. - Asphalt-based coating
Suitable for heavy-duty vehicles like trucks. It offers thick protection but is less flexible. - Wax or oil-based coating
Ideal for maintenance applications. It penetrates small crevices but requires periodic reapplication.
Each option has its pros and cons, but rubberized coating is generally preferred for long-term durability.
Preparation Before Applying Undercoating
Preparation is the most critical stage. Even though rust on car has already been treated, the surface must be perfectly clean and ready to receive the coating.
Skipping this step often leads to peeling or uneven application, reducing the effectiveness of the undercoating.
Cleaning and Drying the Surface
Ensure the undercarriage is completely free from:
- Dust and dirt
- Oil or grease residue
- Loose particles from previous treatments
Use a pressure washer if available, followed by a degreaser for stubborn contaminants. After cleaning, allow the surface to dry completely. Moisture trapped beneath the coating can cause hidden corrosion.
Inspecting the Treated Area
Before you Undercoat a Rusted Car Undercarriage, inspect the surface carefully. Look for:
- Remaining rust spots
- Uneven sanding areas
- Weak or thin metal sections
If necessary, repeat rust treatment on affected areas. This step ensures the coating adheres properly and performs as expected.
Masking Sensitive Components
Protect parts that should not be coated, such as:
- Exhaust system
- Brake components
- Suspension joints
Use masking tape and plastic covers to avoid accidental overspray.
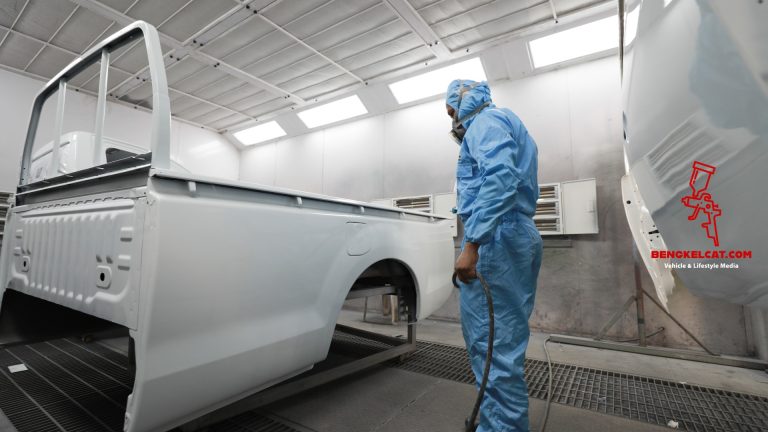
Step-by-Step Guide to Applying Undercoating
Once preparation is complete, you can proceed with the application process. This stage requires patience and attention to detail.
1. Applying Epoxy Primer
Start with an epoxy primer. This layer improves adhesion and adds an extra level of corrosion resistance.
Spray a thin, even coat across the entire surface. Allow it to cure according to the manufacturer’s instructions, typically 30–60 minutes between layers.
2. Anti-Rust Layer Application
After the epoxy primer, apply a dedicated anti-rust coating. This layer penetrates the metal and provides chemical protection against corrosion.
Make sure to cover all corners, seams, and joints thoroughly. These areas are most prone to rust formation.
3. Base Coat or Seal Layer
The next step is the base coat, which acts as a foundation for the undercoating material. It ensures better bonding and a smoother finish.
This stage is often overlooked, but it significantly enhances durability when you Undercoat a Rusted Car Undercarriage.
4. Applying the Undercoating Material
Now apply the chosen undercoating. Use a spray gun or aerosol can for even distribution.
Apply multiple thin layers rather than one thick coat. This prevents dripping and ensures consistent coverage.
Allow each layer to dry before applying the next. Typically, 2–3 layers are sufficient for optimal protection.
5. Final Inspection and Curing
After application, inspect the entire undercarriage. Look for missed spots or uneven coating.
Let the coating cure fully, which may take 24–48 hours depending on the product used. Avoid driving the vehicle during this period.
Common Mistakes to Avoid
Even experienced car owners can make mistakes during this process. Avoiding these errors will improve the final result.
- Applying coating on a damp surface
- Skipping primer or base coat
- Using low-quality materials
- Applying excessively thick layers
- Ignoring hard-to-reach areas
When done incorrectly, the effort to Undercoat a Rusted Car Undercarriage may not deliver long-term benefits.
Estimated Cost and Time
Understanding the cost and time involved helps in planning the process effectively.
For DIY projects:
- Undercoating material: $30–$100
- Primer and anti-rust products: $20–$80
- Tools and accessories: $20–$50
Total estimated cost: $70–$230
For professional services:
- Small cars: $150–$300
- SUVs or trucks: $250–$600
Time required:
- Preparation: 2–4 hours
- Application: 2–3 hours
- Drying/curing: up to 48 hours
While DIY can save money, professional services often provide more consistent results.
Maintenance After Undercoating
Undercoating is not a one-time solution. Regular maintenance ensures continued protection.
Inspect the undercarriage every 6–12 months. Look for:
- Cracks or peeling
- Areas exposed to heavy wear
- Signs of moisture intrusion
Touch up any damaged sections immediately. This prevents small issues from becoming major problems.
If you frequently drive in harsh conditions, consider reapplying the coating every 2–3 years.
Real-World Experience Insight
From hands-on experience in automotive restoration projects, the most effective sequence consistently involves epoxy primer, followed by anti-rust treatment, and then a base coat before the final undercoating. This layered approach significantly improves adhesion and durability.
In several cases where only undercoating was applied without proper layering, the protection failed within a year. However, when the correct process was followed, including epoxy > anti karat > cat dasar, the undercarriage remained corrosion-free for over three years, even under heavy use.
This reinforces the importance of not skipping foundational steps when planning to Undercoat a Rusted Car Undercarriage.
Long-Term Benefits of Proper Undercoating
Investing time and effort into proper undercoating delivers multiple benefits:
- Prevents recurring rust issues
- Extends vehicle lifespan
- Reduces long-term repair costs
- Improves driving comfort by reducing noise
- Enhances resale value
When done correctly, the decision to Undercoat a Rusted Car Undercarriage becomes a long-term investment rather than a temporary fix.
Conclusion
Applying undercoating after proper rust treatment is a crucial step in vehicle maintenance. It protects the undercarriage from future corrosion and preserves the structural integrity of the car.
By following the correct preparation, layering process, and maintenance routine, you can achieve professional-level results even with a DIY approach. Whether you choose to do it yourself or hire a professional, the key lies in consistency and attention to detail.
Ultimately, taking the time to properly Undercoat a Rusted Car Undercarriage ensures your vehicle remains durable, safe, and reliable for years to come.

